在 Linux 上以 All-in-One 模式安装 KubeSphere
Linux运维交流 -在 Linux 上以 All-in-One 模式安装 KubeSphere
Install KubeSphere in All-in-One mode on Linux
背景
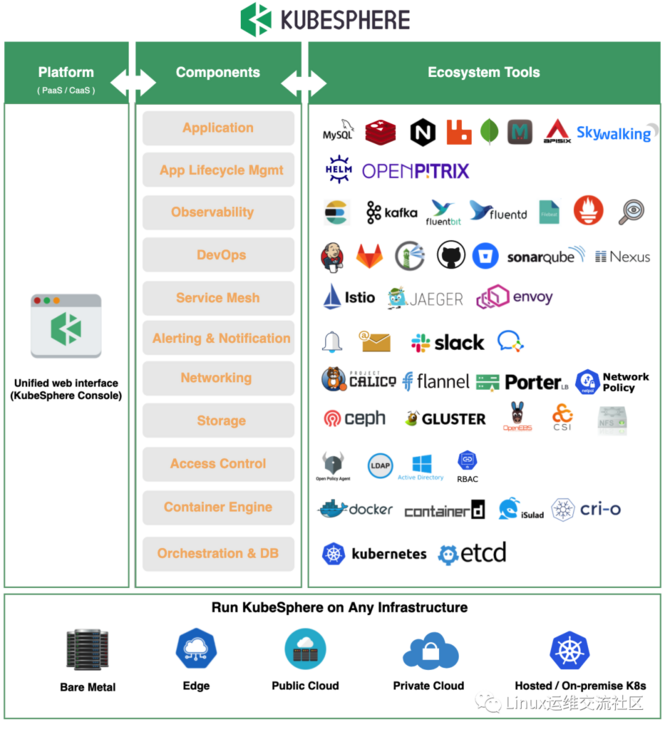
KubeSphere 是在Kubernetes 之上构建的面向云原生应用的分布式操作系统,完全开源,支持多云与多集群管理,提供全栈的IT 自动化运维能力,简化公司的DevOps 工作流。... 作为全栈的多租户容器平台,KubeSphere 提供了运维友好的向导式操作界面,帮助公司快速构建一个强大和功能丰富的容器云平台。
KubeSphere is a distributed operating system for cloud-native applications built on Kubernetes. It is fully open source, supports multi-cloud and multi-cluster management, provides full-stack IT automated operation and maintenance capabilities, and simplifies the company's DevOps workflow. ... As a full-stack multi-tenant container platform, KubeSphere provides an operation and maintenance-friendly guided operation interface to help the company quickly build a powerful and feature-rich container cloud platform.

一、安装 docker
One, install docker
root@hello:~# curl -fsSL https://get.docker.com | bash -s docker --mirror Aliyun
----略----


root@hello:~# docker -v
Docker version 20.10.9, build c2ea9bc
root@hello:~#
二,下载安装 KubeKey
Second, download and install KubeKey
从源代码生成二进制文件
Generate binary files from source code
root@hello:~# git clone https://github.com/kubesphere/kubekey.git
Cloning into 'kubekey'...
remote: Enumerating objects: 13438, done.
remote: Counting objects: 100% (899/899), done.
remote: Compressing objects: 100% (238/238), done.
remote: Total 13438 (delta 745), reused 662 (delta 661), pack-reused 12539
Receiving objects: 100% (13438/13438), 34.95 MiB | 10.14 MiB/s, done.
Resolving deltas: 100% (5424/5424), done.
root@hello:~#
root@hello:~# cd kubekey
root@hello:~/kubekey#
root@hello:~/kubekey#
root@hello:~/kubekey# ./build.sh -p
----略----
注意:
Notice:
在构建之前,需要先安装 Docker。
如果无法访问 https://proxy.golang.org/,比如在墙内,请执行 build.sh -p。
Before building, you need to install Docker.
If you cannot access https://proxy.golang.org/, such as inside a firewall, please execute build.sh -p.
三、 安装所需工具
Three, Tools required for installation
root@hello:~# apt install sudo -y
root@hello:~# apt install curl -y
root@hello:~# apt install openssl -y
root@hello:~# apt install ebtables -y
root@hello:~# apt install socat -y
root@hello:~# apt install ipset -y
root@hello:~# apt install conntrack -y
root@hello:~# apt install nfs-common -y
四、创建集群
Fourth, create a cluster
同时安装 Kubernetes 和 KubeSphere
Install Kubernetes and KubeSphere at the same time
root@hello:~# export KKZONE=cn
root@hello:~# /root/kubekey/output/kk create cluster --with-kubernetes v1.20.4 --with-kubesphere v3.1.1
+-------+------+------+---------+----------+-------+-------+-----------+---------+------------+-------------+------------------+--------------+
| name  | sudo | curl | openssl | ebtables | socat | ipset | conntrack | docker  | nfs client | ceph client | glusterfs client | time         |
+-------+------+------+---------+----------+-------+-------+-----------+---------+------------+-------------+------------------+--------------+
| hello | y    | y    | y       | y        | y     | y     | y         | 20.10.9 | y          |             |                  | UTC 02:50:57 |
+-------+------+------+---------+----------+-------+-------+-----------+---------+------------+-------------+------------------+--------------+


This is a simple check of your environment.
Before installation, you should ensure that your machines meet all requirements specified at
https://github.com/kubesphere/kubekey#requirements-and-recommendations


Continue this installation? [yes/no]: yes
INFO[02:51:00 UTC] Downloading Installation Files
INFO[02:51:00 UTC] Downloading kubeadm ...
----略----
五、验证安装结果
Five, verify the installation results
root@hello:~# kubectl logs -n kubesphere-system $(kubectl get pod -n kubesphere-system -l app=ks-install -o jsonpath='{.items[0].metadata.name}') -f
----略----
#####################################################
###              Welcome to KubeSphere!           ###
#####################################################


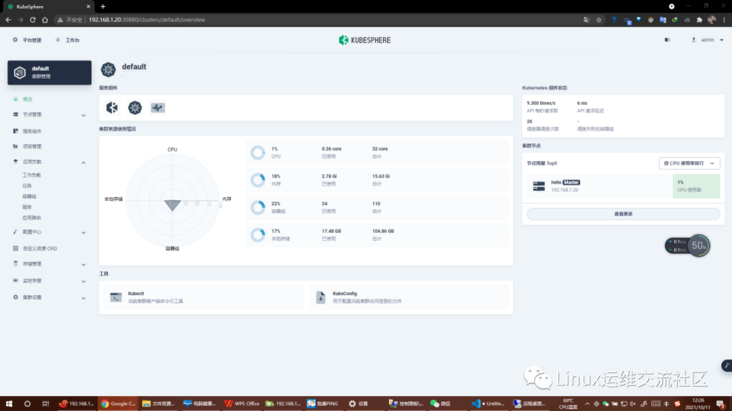
Console: http://192.168.1.20:30880
Account: admin
Password: P@88w0rd


NOTES:
  1. After you log into the console, please check the
     monitoring status of service components in
     "Cluster Management". If any service is not
     ready, please wait patiently until all components
     are up and running.
  2. Please change the default password after login.


#####################################################
https://kubesphere.io             2021-10-11 03:04:53
#####################################################
注意:
Notice:
输出信息会显示 Web 控制台的 IP 地址和端口号,默认的 NodePort 是 30880。现在,您可以使用默认的帐户和密码 (admin/P@88w0rd) 通过 <NodeIP>:30880 访问控制台
The output information will display the IP address and port number of the Web console. The default NodePort is 30880. Now you can use the default account and password (admin/P@88w0rd) to access the console via <NodeIP>:30880

Linux运维交流社区
Linux运维交流社区,互联网新闻以及技术交流。
39篇原创内容
公众号

Tags 标签
kuberneteslinuxkubespheredocker容器扩展阅读
Linux 常用命令
2019-01-12 11:26:35 []linux命令行查看系统有哪些用户
2020-06-28 19:09:43 []HCaaS容器虚机使用之搭建一套LNMP
2020-09-08 12:52:50 []【问题合集】Problem with the SSL CA cert (path? access rights?)
2020-09-20 09:57:21 []关于 MAC 配置 Apache2 + PHP
2020-09-21 12:36:34 []玩转dnmp之自定义容器
2020-09-21 16:59:25 []玩转dnmp之容器之容器之间通讯
2020-09-22 05:03:09 []在 Windows 上可以用 Docker 吗?
2020-09-24 06:15:45 []Laravel项目上线注意点
2020-10-20 21:55:08 []PHP-FPM中-D命令的实现
2020-10-23 13:54:26 []加个好友,技术交流

